10 Essential Excavator Attachments for Any Job Site
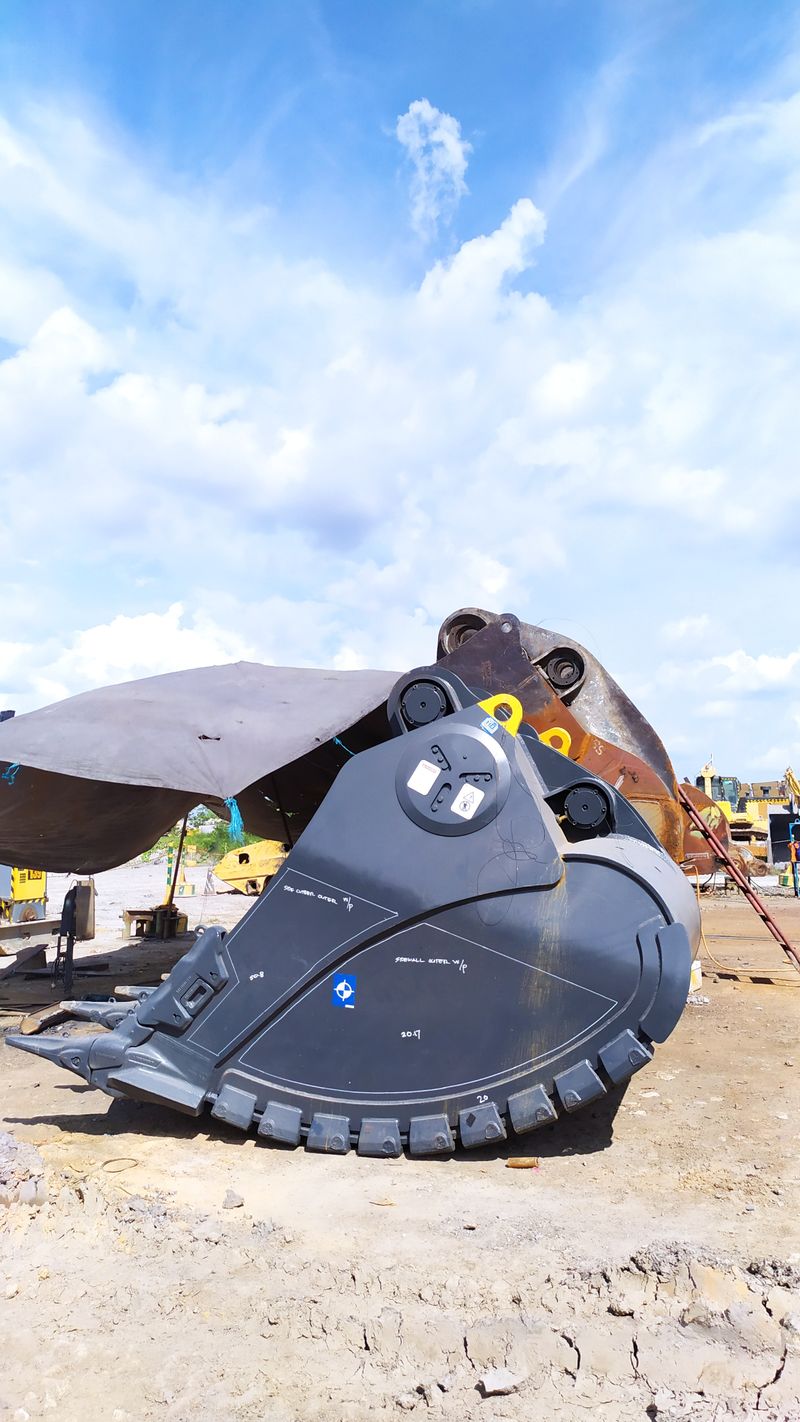
An excavator without the right attachment is like a Swiss Army knife with only a blade. The base machine provides the hydraulic power, structural strength, and reach—but the attachment determines what work actually gets done. Adding even two or three key attachments to your fleet can double or triple the range of tasks a single machine can handle.
This guide covers the 10 most essential excavator attachments, from bucket basics to advanced tools like tiltrotators. For each one, you’ll find a description of what it does, the best use cases, compatibility considerations, and a realistic price range.
A Note on Compatibility and Quick Couplers
Before diving into specific attachments, understand the compatibility framework.
Coupler pins: Excavator attachments attach via two pins that match the carrier machine’s pin size and spacing. Common pin sizes range from 40mm on mini excavators to 100mm+ on large machines. An attachment sized for a 20-ton machine will not fit a 5-ton mini excavator.
Hydraulic flow: Attachments like hammers, augers, and tiltrotators require hydraulic flow from the carrier machine. Each attachment has a specified flow range (e.g., 15–30 GPM) and pressure requirement (e.g., 2,500–3,500 PSI). Mismatching flow can starve an attachment of power or damage it with excess flow.
Quick couplers: A hydraulic quick coupler allows attachment changes from the cab in minutes—a major productivity upgrade over manual pin removal. If you run multiple attachments regularly, a quick coupler is one of the best investments you can make. Expect to spend $2,000–$8,000 depending on machine size.
1. Standard Digging Bucket
The standard digging bucket is the default attachment that comes with virtually every excavator, and for good reason—it handles the widest range of general excavation tasks.
What It Does
Standard buckets are curved, closed-bottomed containers with a series of bucket teeth along the cutting edge. They scoop, load, and move bulk material efficiently.
Best Use Cases
- General earthwork and site grading
- Topsoil stripping
- Loading trucks
- Pond and lake excavation
- Debris removal
Specifications to Know
Buckets are specified by width (typically 12 to 60 inches) and capacity (cubic yards or cubic meters). Wider buckets move more material per pass but require more hydraulic force and are less effective in tight quarters.
Tooth configuration varies by application. General digging uses pointed tiger teeth. Harder material and rock may use a shank-style tooth with replaceable carbide tips.
Price Range
- Mini excavator (1–6 ton): $500–$2,000
- Midi (6–10 ton): $1,500–$4,000
- Standard (10–30 ton): $2,500–$8,000+
Tip: Budget for replacement bucket teeth and sidecutters as a routine consumable. Running worn-down teeth dramatically reduces productivity and increases stress on the bucket shell and machine.
2. Ditching (Grading) Bucket
The ditching bucket—also called a cleanup or grading bucket—is a wide, flat-bottomed bucket designed for finish work rather than bulk digging.
What It Does
Where a standard bucket digs aggressively with teeth, a ditching bucket has a flat, straight cutting edge designed to scrape and grade smooth surfaces. The wider design covers more area per pass.
Best Use Cases
- Ditch cleaning and shaping
- Slope grading and finish grading
- Backfilling and compacting
- Spreading material (topsoil, aggregate)
- Pipe trench backfill and leveling
Specifications to Know
Ditching buckets are often much wider than standard buckets for the same machine class. A 20-ton excavator might run a 36-inch standard bucket for digging but switch to a 72-inch ditching bucket for finish grading. The flat bottom and smooth profile allow precise grading without gouging.
Price Range
- Mini excavator: $600–$2,500
- Standard class: $2,000–$6,000
3. Rock Bucket
When the ground gets hard—compacted aggregate, shale, soft rock, or construction debris—a standard digging bucket wears out quickly. The rock bucket is purpose-built for abrasive, high-wear conditions.
What It Does
Rock buckets use heavier-gauge steel throughout, reinforced wear plates on the bottom and sides, and harder cutting edge steel compared to standard buckets. They typically have fewer, more robust teeth or a single-bar cutting edge for fragmenting rather than scooping.
Best Use Cases
- Rock excavation (shale, sandstone, soft limestone)
- Quarry work and shot rock loading
- Demolition debris (concrete, brick, masonry)
- Highly abrasive soils (gravel, caliche, crushed aggregate)
Price Range
- Mini excavator: $800–$2,500
- Standard class: $3,000–$10,000+
Note: Rock buckets are heavier than standard buckets. Check your machine’s lift capacity with the heavier attachment before spec’ing.
4. Hydraulic Breaker (Hammer)
The hydraulic breaker—often called a hammer—is arguably the single most transformative attachment for job site versatility. It turns your excavator into a demolition and rock-breaking machine.
What It Does
A hydraulic breaker uses a piston driven by the excavator’s hydraulic system to deliver rapid, high-force blows through a steel tool (chisel, moil point, or blunt point). Impact energy is measured in foot-pounds; a mid-size breaker for a 20-ton excavator delivers 5,000–15,000 ft-lbs per blow at 400–800 blows per minute.
Best Use Cases
- Breaking up concrete slabs, foundations, and pavement
- Rock breaking for trench work in hard ground
- Demolition of masonry and concrete structures
- Breaking frozen ground in cold climates
- Mining and quarry applications
Compatibility Considerations
Hammers require:
- Adequate hydraulic flow (typically 15–45 GPM for mid-size units)
- Correct operating pressure (2,500–3,500 PSI is common)
- Nitrogen-charged accumulators properly pressurized to spec (low nitrogen charge is a common source of poor breaker performance)
Blank firing (operating the breaker without the tool in contact with the material) is one of the most common causes of breaker damage—never run a breaker without material contact.
Price Range
- Mini class (1–5 ton carrier): $2,000–$6,000
- Standard class (15–30 ton): $8,000–$25,000
- New vs. used: Used hammers in good condition represent significant savings; inspect seals, accumulator charge, and tool wear before buying used.
Recommended accessories:
- Spare moil point and chisel tools
- Hydraulic breaker grease (specialized formulation for tool bushings)
- Hearing protection—breaker operation is loud, typically 95–110 dB at the operator position
5. Auger
An auger drive converts the excavator’s hydraulic power into rotational force, drilling clean, round holes in the ground. It’s one of the most efficient tools for repetitive hole-boring tasks.
What It Does
The auger attachment consists of a hydraulic rotary motor (the drive unit) and interchangeable auger flights in various diameters. The excavator’s boom arm provides downforce while the auger motor spins the flight into the ground.
Best Use Cases
- Fence post and signpost holes
- Tree and shrub planting
- Deck and structure footings (smaller diameters)
- Utility pole and guard rail installation
- Soil sampling
Specifications
- Auger diameter: Typically ranges from 6 inches to 48+ inches; match to the application
- Auger length: Standard flights are 3–5 feet; extensions can increase depth
- Drive torque rating: Must be matched to the carrier machine’s hydraulic output; running an undersized motor on a high-flow machine will damage the auger drive
Price Range
- Mini class auger drive + 12” flight: $1,500–$4,000
- Mid/standard class: $3,000–$8,000 for drive unit; add $300–$1,000 per additional flight diameter
6. Hydraulic Thumb
A hydraulic thumb is a claw-like mechanism that mounts to the arm and works in opposition to the bucket, allowing the excavator to grip and handle irregular objects. This single attachment dramatically expands the machine’s utility.
What It Does
The thumb mounts on the arm just behind the bucket. A hydraulic cylinder opens and closes it against the bucket. With the thumb, the excavator can grip stumps, rocks, demolition debris, pipe, lumber, and concrete chunks—essentially functioning like a giant hand.
Best Use Cases
- Land clearing (gripping stumps, logs, brush)
- Demolition debris handling
- Pipe and culvert placement
- Material sorting and loading
- Rock removal in rocky excavation conditions
Types
Fixed/mechanical thumb: Bolts to the arm at a fixed angle; manual repositioning required. Lower cost, simpler, but less versatile.
Hydraulic thumb: Cylinder-operated from the cab. Much more useful because the operator can open, close, and position the thumb while simultaneously operating the bucket.
Price Range
- Mechanical thumb (mini): $300–$800
- Hydraulic thumb (mini): $800–$2,500
- Hydraulic thumb (standard class): $2,500–$6,000
Highly recommended for any machine doing clearing, demo, or rock work.
7. Grapple
Where a thumb allows the bucket to grip objects, a grapple replaces the bucket entirely—it’s purpose-built for gripping and moving bulk material or individual large objects.
What It Does
Grapples consist of two or more tines or jaws that open and close hydraulically, gripping material without the need for a bucket. Multiple configurations exist for different materials.
Types
Rotating grapple: Includes a rotator motor for 360-degree rotation. Invaluable for precisely placing pipe, timber, and structural members.
Sorting grapple: Open-tine design allows soil to fall through while retaining bulky material (wood, rebar, concrete chunks). Common in demolition and recycling.
Rock/demolition grapple: Heavy-duty, close-tine design for dense debris.
Brush/forestry grapple: Tines designed to handle irregular brush and logging material.
Best Use Cases
- Demolition site debris sorting and loading
- Forestry and land clearing operations
- Scrap metal handling
- Pipe and culvert placement
- Recycling facility material handling
Price Range
- Mini class: $1,500–$5,000
- Standard class: $5,000–$20,000+ (rotating grapples command a significant premium)
8. Tiltrotator
The tiltrotator is the most technologically advanced attachment on this list—and arguably the biggest productivity multiplier available. It’s standard equipment on Scandinavian job sites and rapidly gaining traction in North America.
What It Does
A tiltrotator mounts between the excavator’s arm and the bucket (or other attachment). It provides:
- 360-degree continuous rotation of the attachment
- +/- 40–50 degrees of tilt in both directions
This means the operator can angle the bucket to dig on slopes, grade at any angle, and reach into corners without repositioning the machine. A skilled operator with a tiltrotator can replace multiple machine repositions and grade work passes with a single movement.
Best Use Cases
- Finish grading (slopes, ditches, contoured areas)
- Utility installation in confined areas
- Landscaping and precise earthwork
- Any application requiring the attachment to work at an angle
Compatibility Considerations
Tiltrotators require dedicated hydraulic circuits (usually two additional circuits beyond standard) and are typically paired with a compatible quick coupler system. Many require ECU integration for proportional control from the cab. They are an investment that makes most sense on a primary production machine used daily.
Price Range
- Mid-size class (10–25 ton): $15,000–$35,000 installed
- Full systems with compatible quick coupler: $20,000–$45,000
Best for: Contractors doing significant finish grade work, landscaping, or urban utility work where repositioning time is a major cost driver.
9. Compactor Plate
A compactor plate attachment—sometimes called a vibratory plate compactor or trench compactor—mounts on the arm and uses the excavator’s hydraulic system to drive a vibratory compactor plate.
What It Does
Rather than using a separate walk-behind plate compactor in the trench, the excavator compactor plate applies compaction force directly with the excavator, keeping ground-level workers out of the trench and dramatically speeding up backfill operations.
Best Use Cases
- Trench backfill compaction after pipe installation
- Foundation backfill compaction
- Slope compaction
- Compacting in tight areas inaccessible to rolling equipment
Key Specs to Know
- Plate size: Matched to trench width; 12”–24” for typical utility trenches
- Centrifugal force: The higher the force output, the more effective the compaction; verify the plate’s output matches the application requirements
- Hydraulic flow requirement: Typically 15–30 GPM
Price Range
- Mini class: $1,500–$4,000
- Standard class: $3,000–$8,000
10. Clamshell Bucket
The clamshell bucket is a specialized attachment for deep excavation, pier holes, and shaft drilling—applications where the conventional boom-and-arm geometry can’t reach the work.
What It Does
A clamshell consists of two hinged bucket halves that close hydraulically to grab material from directly below the attachment. It’s suspended from the boom tip and lowered vertically into the excavation.
Best Use Cases
- Deep shaft and caisson excavation
- Environmental cleanup (contaminated soil extraction)
- Dredging operations
- Foundation pier holes
- Confined-space excavation where boom angle prohibits standard digging
Price Range
- Standard class: $5,000–$20,000 depending on size and clamshell capacity
Attachment Investment Strategy
Not every job site needs all 10 attachments. Here’s a prioritization framework based on operation type:
General excavation contractor: Standard bucket (multiple widths) + ditching bucket + hydraulic thumb + hydraulic breaker
Land clearing and forestry: Standard bucket + hydraulic thumb + grapple (rotating if budget allows)
Utility/pipeline: Standard bucket + ditching bucket + compactor plate + auger
Demolition: Standard bucket + rock bucket + hydraulic breaker + sorting grapple
Landscaping: Standard bucket + ditching bucket + auger + hydraulic thumb + tiltrotator (if volume justifies)
Final Thoughts
The right attachment turns an excavator from a single-purpose digging machine into a multi-tool production platform. The hydraulic thumb alone—one of the least expensive attachments on this list—changes the way you work almost every day. The tiltrotator takes years to master but delivers productivity gains that pay for themselves on the right operations.
Start with the attachments that address your highest-frequency bottlenecks. Add from there as your work evolves. And always match the attachment to the carrier machine—a mismatch in pin size, hydraulic flow, or weight class creates safety hazards and damaged equipment.

Ironworks Insider Editorial Team
Independent trade-focused editorial team