How to Dig a Trench with an Excavator: Step-by-Step Guide
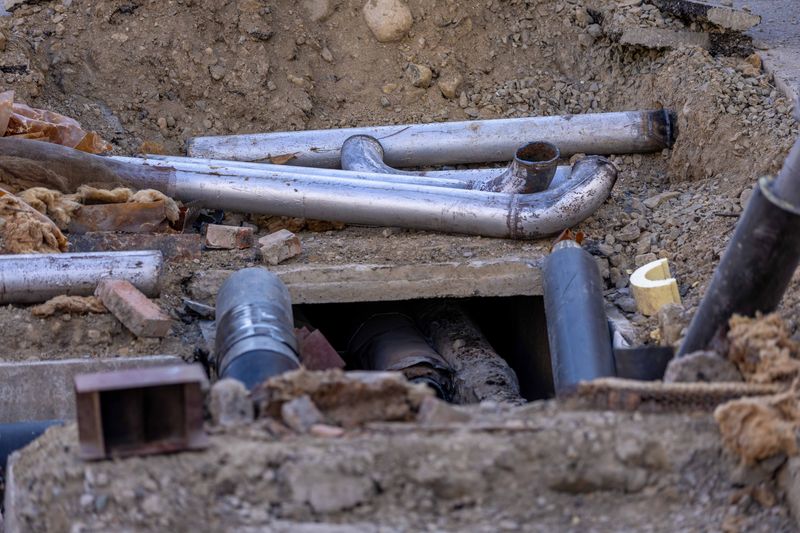
Trenching is one of the most common—and most hazardous—excavation operations in construction. Utilities get installed. Drainage systems get laid. Foundations get dug. And every year, preventable fatalities occur because someone skipped a step in the planning process or ignored a safety standard.
This guide walks through the complete process of digging a trench with an excavator: from the first call before you break ground, through equipment setup, digging technique, OSHA compliance, and spoil pile management. Follow every step—especially the safety requirements. Trench collapses kill experienced workers without warning.
Before You Dig: The Non-Negotiable First Step
Call 811 — Every Time, No Exceptions
In the United States, 811 is the national “Call Before You Dig” number. Before any ground disturbance, you are legally required to notify underground utility operators of your intent to excavate. This triggers the utility location service, which marks underground lines with colored flags or paint.
How it works:
- Call 811 (or submit a request online at call811.com) at least 3 business days before you plan to dig in most states. Some states require more notice—check your state’s specific requirements.
- Provide your location, the scope of work, and the proposed start date.
- Member utilities will send locators to mark their infrastructure within the notification window.
- Once marks are in place, respect the tolerance zone—typically 18–24 inches on each side of a marked utility. Do not use mechanized equipment within the tolerance zone without hand-digging to expose and verify the utility’s exact position.
Color code for utility marking flags/paint:
- Red — Electric power lines, cables, conduit
- Yellow — Gas, oil, steam, petroleum lines Orange — Telecommunications, cable TV, conduit
- Blue — Potable water
- Green — Sewers and drain lines
- White — Proposed excavation limits
- Pink — Temporary survey markings
- Purple — Reclaimed water, slurry lines
Missing a gas line with an excavator is potentially fatal. Missing a fiber trunk line can cost you hundreds of thousands of dollars in damages. This step is non-negotiable.
Step 1: Planning the Trench
Good planning before mobilizing equipment saves time, money, and lives.
Define the Trench Layout
- Establish the trench centerline with stakes or spray paint before the excavator arrives. Offset the spoil pile side to give yourself a clear travel path for trucks or a clean spoil management area.
- Mark the start and end points clearly. If working to a grade (sloped trench bottom for drainage or gravity flow), calculate the cut depths at each end and mark them on stakes.
- Note any conflicts with the utility marking layout. If a marked utility crosses your trench path, plan for hand-digging in those zones.
Determine Required Trench Dimensions
Trench dimensions depend on what’s being installed. General guidelines:
- Width: Minimum 12 inches wider than the pipe or conduit being installed on each side. For pipe with bell ends, width at the bell is the controlling dimension.
- Depth: Determined by the required installation depth—which is governed by frost depth (for water lines), minimum cover requirements (varies by utility type and jurisdiction), and invert elevation for gravity systems.
- Trench bottom: Should be firm, undisturbed soil or prepared bedding material. Soft or wet trench bottoms require special bedding preparation before pipe installation.
Identify OSHA Soil Classification
OSHA classifies soil into three types that dictate required trench protection:
- Type A: Cohesive soils (clay, etc.) with unconfined compressive strength greater than 1.5 tsf. No visible cracks, no fissures, no water seepage.
- Type B: Cohesive soils with compressive strength between 0.5 and 1.5 tsf; previously disturbed soils; soils subject to vibration; granular soils that are cohesionless.
- Type C: Granular soils (gravel, sand), submerged soils, soils from which water is freely seeping, or unstable rock.
The worst soil condition in the excavation controls the classification. If you see water seeping in at any point, downgrade to Type C.
Step 2: Equipment Setup and Site Preparation
Machine Positioning
Position the excavator parallel to the planned trench centerline, with the cab oriented so the operator is facing the trench. The spoil pile should be on the opposite side of the trench from the pipe installation crew—never put spoil material where workers will need to stand.
Minimum spoil pile setback: Per OSHA 29 CFR 1926.651, spoil and other material must be kept at least 2 feet from the edge of the trench. In practice, placing spoil 3–4 feet from the edge is better practice, especially in loose or wet soil where sloughing can push material into the trench.
Ground Preparation
- Clear vegetation or obstructions along the trench alignment before digging.
- If working in a paved area, saw cut the pavement edge cleanly before excavating. This produces a clean trench wall and reduces the amount of pavement breakage to dispose of.
- Establish a clear path for truck access if the material will be hauled off-site.
Bucket Selection
For trenching, the standard rule is: use the narrowest bucket that matches or slightly exceeds the required trench width. A narrower bucket means less material to handle, a cleaner trench wall, and less disruption to the surrounding soil.
For soft to medium soils, a standard tooth bucket works well. For harder soils or rock, a rock bucket or a narrow rock tooth bucket provides better penetration. For very clean, precise trench walls (shoring compatibility), a flat-edge ditching-style trench bucket helps produce square, consistent walls.
Step 3: Digging Technique for Trenches
Establish the Starting Cut
Begin at one end of the trench. Position the bucket teeth at the marked edge of the trench and make the first cut to the required depth in a controlled, deliberate pass.
For deeper trenches (over 6 feet), you will likely need multiple passes at different depths rather than trying to reach full depth in a single cut. In soft soils, some operators make a narrow pioneer cut along the full length of the trench, then widen and deepen in subsequent passes.
Maintaining Straight Walls
Straight, vertical trench walls are important for several reasons:
- Straight walls minimize the volume of material excavated (and later backfilled).
- They’re easier to shore, shore against, and bench.
- Irregular walls create void spaces around the pipe that can cause differential settling.
Technique for straight walls:
- Use the arm and boom together to pull the bucket in a controlled vertical arc that tracks close to the desired wall angle.
- Make consistent, overlapping cuts along the trench length before deepening—this produces a flat bench at each level.
- Resist the urge to swing out while pulling the bucket if you want vertical walls; swinging widens the trench bottom unevenly.
- Check wall angle periodically with a level or slope board.
Digging to Grade
Many trench applications require a sloped bottom—gravity sewer, stormwater, and drainage pipe all need consistent fall (typically 1/8” to 1/4” per foot, depending on the application).
How to maintain grade:
- Establish the required cut depth at each end of the trench using grade stakes.
- Use a laser level or automatic grade laser system to monitor the trench bottom depth as you dig. Rotating laser levels with a grade rod held at the trench bottom give you real-time feedback.
- Some operators use a string line stretched between grade stakes as a visual reference.
- Modern excavators with machine control/grade control systems can automate this—the system prevents the bucket from digging below the target grade surface.
Trench Efficiency Tips
- Work in sections. Don’t try to open the entire length of a long trench before starting pipe installation. Open a manageable section, install pipe, backfill, and then open the next section. This minimizes the length of open, unprotected trench.
- Keep the machine moving parallel to the trench. Track forward in small increments rather than reaching as far as possible and missing compacted material between reach positions.
- Clean the trench bottom with a flat-edge bucket or grading bucket before pipe installation to remove loose material and ensure firm bearing.
Step 4: OSHA Trench Safety Requirements
This is the most critical section of this guide. Trench collapses are catastrophic—they occur suddenly, and the weight of collapsing soil is sufficient to kill a person instantly. OSHA’s trenching and excavation standard (29 CFR 1926 Subpart P) is one of the most enforced construction standards for good reason.
Who Needs Trench Protection?
Any trench 5 feet or deeper requires a protective system unless the excavation is in solid rock. Trenches under 5 feet deep should still be evaluated—if the competent person determines that the soil is unstable or conditions create a hazard, protection is required regardless of depth.
Trenches 20 feet or deeper require a protective system designed by a registered professional engineer.
Three Types of Protective Systems
Option 1: Sloping
Slope the trench walls away from the work area at an angle that prevents collapse. The required slope angle depends on soil type:
- Type A soil: Maximum 3/4:1 (horizontal:vertical) = 53-degree angle from horizontal
- Type B soil: Maximum 1:1 = 45-degree angle
- Type C soil: Maximum 1.5:1 = 34-degree angle
Sloping is simple and requires no additional equipment but requires significantly more excavation volume and a wider surface footprint—it’s most practical where space is available and material volumes aren’t a constraint.
Option 2: Shoring
Install structural supports—hydraulic shoring, pneumatic shoring, timber shoring, or trench boxes—against the trench walls before workers enter. Hydraulic aluminum shoring (also called speed shores or trench shores) is the most common system in utility construction.
Hydraulic shoring procedure:
- Dig to depth.
- Install the hydraulic shoring from the top down, using the excavator to position the equipment if necessary.
- Workers may enter the trench to connect walers and extend the shore legs.
- Never allow a worker in an unshored section of trench while shoring is being installed.
Option 3: Trench Box / Trench Shield
A trench box (also called a shield) consists of two steel or aluminum walls connected by spreader bars. The box is placed into the trench and slid along as work progresses—the workers stay inside the box, which protects them in the event of a wall collapse.
Key requirements:
- The box is sized to the trench depth and width.
- Workers must stay inside the protected area and never work outside the box at depth.
- The box must be moved incrementally; never move a box while a worker is inside.
The Competent Person Requirement
OSHA requires that a Competent Person be designated for every trenching operation. The Competent Person must:
- Have the training and experience to identify hazardous conditions
- Have the authority to stop work immediately if a hazard is identified
- Classify the soil on-site using physical tests (thumb test, pocket penetrometer, torvane shear device)
- Inspect the trench daily and after any rain, freeze-thaw event, or unusual occurrence
This cannot be delegated to someone without the training and authority. The Competent Person designation is a legal responsibility—and being named as Competent Person for a trench that collapses carries serious legal consequences.
Additional OSHA Requirements
- Access and egress: Ladders, steps, or ramps must be located within 25 feet of every worker in the trench. Climbing the trench wall is not acceptable.
- Water accumulation: Never allow workers in a trench with accumulated water unless the water is controlled and a Competent Person has evaluated the conditions.
- Atmosphere testing: In trenches where hazardous atmospheres are possible (near fuel lines, sewers, or known contamination), atmospheric testing is required before worker entry.
- Spoil setback: As noted earlier—minimum 2 feet from the trench edge.
- Surface encumbrances: Trees, vehicles, and large surface loads near the trench edge can contribute to collapse. Keep heavy equipment a safe distance from the trench edge, especially in soft soil.
Step 5: Spoil Pile Management
Location and Setback
The spoil pile serves two functions: temporary storage of excavated material (for later backfill) and/or staging of material that will be hauled off. In either case:
- Maintain the 2-foot minimum setback from the trench edge (greater is better)
- Don’t allow the pile to become so high that it creates a fall hazard or blocks sight lines around the work zone
- In sloped terrain, place the spoil on the uphill side of the trench where possible to prevent water runoff from flowing back into the trench
Haul-Off vs. Stockpile
If the excavated material will be re-used as backfill (and is suitable—no organic material, trash, or extremely wet soil), stockpile it adjacent to the trench for efficient backfill operations. If the material is unsuitable or if import fill is specified, arrange truck haul-off and a clear staging area for trucks that doesn’t conflict with the active excavation zone.
Step 6: Backfill and Compaction
Once pipe is installed and inspections are complete, backfill the trench in compacted lifts. Typical requirements:
- Lift thickness: 8–12 inches of loose material per lift, compacted to specified density
- Initial backfill: Often specified as select granular material (clean sand or granular) placed by hand around the pipe to the springline, then machine-placed above
- Compaction verification: Most public work specifications require Proctor compaction testing at specified intervals
Use a compactor plate attachment on the excavator or a walk-behind plate compactor for trench compaction. Avoid using the excavator bucket to tamp material directly against the pipe—this can crack or deflect the pipe.
Safety Gear for Trench Work
Every person on or near an open trench should have:
- ANSI Z89.1 hard hat — Full-brim recommended for overhead protection
- ANSI Z87.1 safety glasses — Eye protection from flying soil and debris
- Class 2 high-visibility vest — Required near any public roadway; recommended everywhere
- Steel-toed, waterproof work boots (ASTM F2413) — Waterproof is key; trench conditions are often wet
- Hearing protection — If working near a compactor or breaker
- Nitrile gloves — For pipe handling, shoring installation, and general material handling
Final Thoughts
Trenching looks simple. It is, in many ways, a straightforward operation—but the gap between a safe, efficient trench and a dangerous, liability-laden mess is entirely in the planning and discipline.
Call 811 every time. Know your soil. Protect your people in the trench. Keep the spoil back. And dig to grade from the start—fixing slope errors after the pipe is in is expensive and time-consuming.
The machine does the heavy lifting. The operator and the competent person keep the operation safe and legal.

Ironworks Insider Editorial Team
Independent trade-focused editorial team