How to Operate a Skid Steer: Controls, Safety, and Techniques
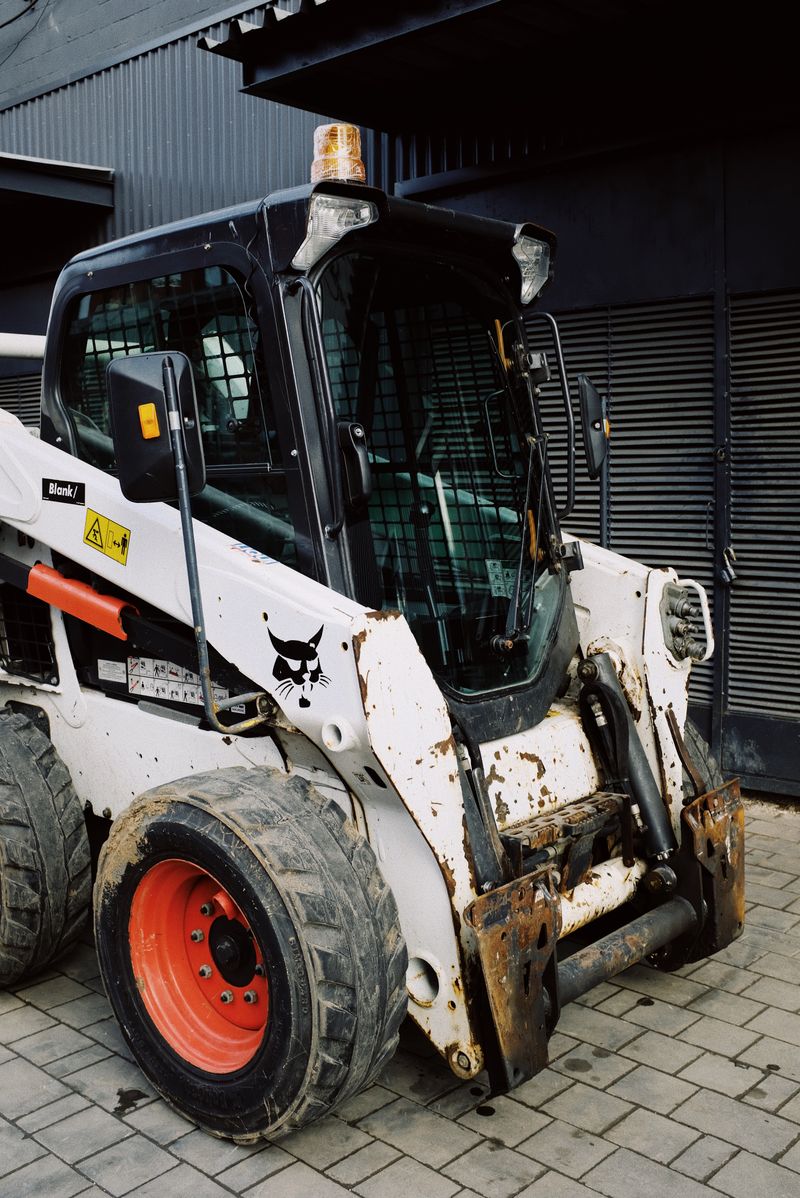
Learning to operate a skid steer is one of the most valuable skills a contractor, landscaper, or property owner can develop. These machines are compact, versatile, and capable — but they demand respect. Skid steers are involved in a disproportionate number of equipment-related injuries compared to other compact machinery, almost always because of shortcuts taken during entry/exit, failure to engage the restraint system, or operating on terrain beyond the machine’s capabilities.
This guide will walk you through everything a new operator needs to know: the pre-operation inspection, control systems, basic movements, bucket techniques, slope operation, and shutdown. Work through each section carefully. Experience is the best teacher, but starting with solid fundamentals will keep you safe and protect the machine.
Required PPE Before You Start
Before you even walk around the machine, gear up properly.
- Hard hat: MSA V-Gard Class E Hard Hat — required on most construction sites
- Safety glasses: 3M SecureFit 400 Series — debris is a constant hazard around skid steers
- High-visibility vest: Ergodyne GloWear 8215BA — ANSI Class 2
- Steel-toed boots: Caterpillar Second Shift Steel Toe — waterproof construction boot
- Gloves: Mechanix Wear M-Pact — for all entry/exit and attachment work
- Hearing protection: 3M Peltor X2A Earmuffs — skid steers are loud; protect your hearing on extended shifts
Step 1: Pre-Operation Inspection (Walk-Around)
Never skip the pre-op inspection. A 10-minute walk-around before every shift prevents breakdowns, avoids serious damage, and can save your life if you catch a hydraulic leak or a tire issue before it becomes a crisis.
Engine and Fluid Checks
Walk to the rear of the machine (where the engine is on most skid steers) and check:
- Engine oil: Pull the dipstick; oil should be between MIN and MAX marks, not dark black or milky
- Hydraulic fluid reservoir: Check the sight glass or dipstick; low hydraulic fluid leads to overheating and component damage
- Coolant level: Check the overflow reservoir, not the radiator cap
- Fuel level: Note the gauge so you don’t run out mid-job
- Air filter indicator: Red indicator = filter needs service before operation
- Radiator and cooler screens: Clear any debris, especially if you’ve been working in dusty or leafy conditions
Structural and Mechanical Checks
- Tires: Check pressure on pneumatic tires; inspect solids and foam-filled for cuts or chunks
- Hydraulic hoses: Look for cracks, abrasion, or seeping fluid — especially at the boom and attachment connections
- Boom and arms: Check for cracks at weld points, especially near the attachment plate
- Quick-attach plate: Confirm the attachment is fully latched; both locking pins should be fully engaged
- Bucket/attachment: Look for cracks, bent cutting edges, or loose hardware
- Cab glass and mirrors: Clean for visibility; inspect for cracks in ROPS/FOPS structure
Ground Check
Walk the area you intend to work. Note:
- Slopes greater than 15–20 degrees — approach or avoid carefully
- Soft spots, utilities, drop-offs, or hidden obstacles
- Overhead hazards — power lines, low structures, trees
- Bystanders — establish a safe work zone before operating
Step 2: Entering the Machine Safely
Entering and exiting are among the most common moments for skid steer injuries. Follow the three-point contact rule at all times: always maintain three contact points (two hands and one foot, or two feet and one hand) with the machine while climbing in or out.
Safe Entry Procedure
- Lower the boom and attachment fully to the ground before entering
- Clear the area — confirm no one is near the machine
- Face the machine when climbing — never turn your back to the cab
- Use the grab handles and foot pegs provided; never use the steering levers or controls as handholds
- Climb into the seat and sit fully back
- Fasten the seat belt before doing anything else
- Lower the restraint bar (lap bar) until it locks over your thighs
Never operate a skid steer without the seat belt fastened and the restraint bar fully engaged. Most modern machines will not allow hydraulic function until the restraint bar is down — but older machines may not have this interlock. Either way, the bar must be down before you operate.
Step 3: Understanding the Restraint Bar and Safety Interlocks
The restraint bar (also called the lap bar or safety bar) is the primary safety system on a skid steer. It locks you in place in the event of a tip-over or sudden pitch change. Without it engaged:
- The machine’s hydraulics may be disabled (on newer models)
- In a rollover, you are at extreme risk of being thrown from the machine and crushed
On modern machines, you will also find:
- Seatbelt interlock: Must be buckled before hydraulics operate
- Operator presence system: Seat sensor detects weight; standing up may cut power
- Door interlock: Some enclosed cab models require the door closed to operate
Respect these systems. They exist because operators have been killed when they didn’t.
Step 4: Starting the Machine
- Confirm the restraint bar is down and the seat belt is fastened
- Turn the key to the ON position; allow glow plugs to cycle on diesel models (indicator light will go out)
- Turn to START — the engine should catch quickly on a healthy machine
- Allow 2–3 minutes of warm-up in cold weather before putting the hydraulics under load
- Check the dash gauges: oil pressure, hydraulic temp, battery charge, and fuel
Step 5: Understanding the Controls
Skid steers use two types of hand control patterns: ISO and SAE. Understanding which pattern your machine uses — and which you prefer — is essential before you move.
ISO Control Pattern (Most Common on New Machines)
In ISO, both hands control drive and implement functions simultaneously:
-
Left joystick (drive):
- Forward = machine drives forward
- Back = machine reverses
- Left = left tracks/wheels slow; machine turns left
- Right = right tracks/wheels slow; machine turns right
-
Right joystick (loader/bucket):
- Forward = boom lowers
- Back = boom raises
- Left = bucket tilts forward (dumps)
- Right = bucket tilts back (curls/scoops)
SAE Control Pattern (Traditional)
In SAE, the left-hand lever controls both drive and bucket tilt, while the right-hand lever controls both drive and boom height. This pattern feels less intuitive to many new operators but was the industry standard for decades and is still preferred by many experienced operators.
-
Left lever:
- Forward/back = left side drive
- Twist or side = bucket tilt (varies by manufacturer)
-
Right lever:
- Forward/back = right side drive
- Twist or side = boom raise/lower
Most modern skid steers allow you to switch between ISO and SAE via the cab controls. New operators are generally recommended to learn on ISO first, then try SAE if desired.
Foot Controls
Many machines also have foot pedals for drive function (especially older models), or additional pedal functions for auxiliary hydraulics and attachment engagement. Check your operator’s manual for your specific machine.
Step 6: Basic Machine Movements
Moving Forward and Reverse
Push both joysticks (ISO) forward simultaneously for straight travel. Pull both back to reverse. The machine will track straight on level ground. Start slow — skid steers respond quickly and new operators often over-control.
Turning
In ISO, push the right joystick forward while holding the left still (or pulling back slightly) to turn left. Reverse for a right turn. The more aggressive the difference between the two sides, the tighter the turn.
A counter-rotation (spinning in place) is achieved by pushing one joystick fully forward while pulling the other fully back. This is the skid steer’s signature move — useful in tight spaces but damaging to turf and soft surfaces.
Speed Control
Most machines have a turtle/rabbit speed selector that limits maximum travel speed. Start on turtle (low speed) until you are comfortable with the machine’s response. Switch to rabbit (high speed) only on open ground and at the direction of a supervisor or experienced operator.
Step 7: Bucket Operations
Raising and Lowering the Boom
In ISO, the right joystick back raises the boom; forward lowers it. Raise the boom slowly with a loaded bucket — sudden upward movement can cause the machine to rock forward and lose stability.
Curling (Scooping) and Dumping
- Right joystick right (ISO): Curls the bucket back toward the machine — this is the scooping position; use it to pick up material
- Right joystick left (ISO): Tilts the bucket forward to dump material
Loading Technique
- Approach the pile in a straight line at low speed
- Keep the bucket low to the ground (6–12 inches) as you approach
- Drive into the material at a controlled speed — do not ram the pile at full throttle
- As the bucket fills, curl back to retain material
- Raise the boom slightly (travel height is 12–18 inches off the ground)
- Reverse out of the pile, then drive to your dump location
Travel height: Always carry a loaded bucket low — 12–18 inches off the ground. Carrying material high raises the center of gravity significantly and increases tip-over risk.
Dumping Into a Truck
- Drive toward the truck and stop with the bucket positioned over the bed
- Raise the boom to a safe dump height
- Tilt the bucket forward slowly to dump the load
- Do not shake or jerk the bucket with the boom at full height — this strains the hydraulic cylinders and the boom structure
Step 8: Working on Slopes
Slopes are where skid steers become dangerous if not handled correctly. Follow these rules strictly:
- Carry loads low — never travel on a slope with a raised boom
- Drive up and down slopes — never drive across a steep slope (diagonally or sideways)
- Do not exceed 20–25 degrees of slope for most machines without specific approval from the manufacturer’s guidelines
- Go down slopes in reverse when carrying a loaded bucket — this keeps the load over the uphill side and improves stability
- Never make sharp turns on slopes — straighten out before any direction change
If the machine begins to tip, do not jump out. Stay belted in with the restraint bar down. The ROPS/FOPS structure is designed to protect you. Jumping increases the chance of being crushed.
Step 9: Changing Attachments
- Lower the boom fully and set the current attachment on a flat, firm surface
- Engage the parking brake and shut down the machine
- Relieve hydraulic pressure by moving the controls after shutdown (residual pressure must be released before disconnecting hydraulic hoses)
- Disconnect hydraulic hoses from the attachment (wear gloves — residual pressure can cause injury)
- Release the quick-attach locking pins (lever, pull pin, or electric depending on model)
- Back the machine away from the attachment
- Drive into the new attachment, align the quick-attach plate with the attachment frame, and engage the locking pins
- Confirm both pins are fully engaged before reconnecting hydraulic hoses
- Reconnect hoses, start the machine, and test the attachment at ground level before lifting
Never operate with an improperly latched attachment. A dropped attachment can cause serious injury and machine damage.
Step 10: Shutdown Procedure
- Find a level surface for shutdown when possible
- Lower the boom and attachment fully to the ground
- Engage the parking brake
- Allow the engine to idle for 2–3 minutes to cool turbochargers and hydraulics (especially after heavy work)
- Move all controls to neutral
- Turn the key off
- Raise the restraint bar
- Exit the machine using three-point contact, facing the machine
- Lock the cab door if leaving the machine unattended
Common Mistakes New Operators Make
Carrying loads too high. This is the number one tip-over cause. Keep loads low during travel.
Skipping the pre-op inspection. Hydraulic hose failures, flat tires, and low oil are almost always preventable.
Counter-rotating on finished surfaces. Spinning in place destroys turf and damages asphalt. Use three-point turns on sensitive surfaces.
Overloading the machine. Check the rated operating capacity (ROC) and never exceed it. The ROC is typically posted on a placard inside the cab.
Operating without the restraint bar. The restraint bar is non-negotiable. Full stop.
Digging into hard material too aggressively. Drive the bucket in at controlled speed. Ramming the pile at full throttle bends cutting edges, stresses the boom, and wastes fuel.
Ignoring warning lights. If a warning lamp illuminates, stop the machine, shut down, and diagnose before continuing. Modern machines are sophisticated — warning lights exist for a reason.
Maintenance Supplies Every Operator Should Have
- Grease gun: Lincoln Industrial 1162 Heavy Duty Grease Gun — grease all zerks daily or per the manufacturer’s schedule
- Multi-grade grease: Lucas Oil Red N Tacky Grease
- Hydraulic fluid: ISO 46 or per manufacturer spec — keep a gallon on the machine
- Engine oil: 15W-40 diesel — for top-offs between changes
- Tire pressure gauge: JACO ElitePro Digital Tire Gauge — check pneumatic tires daily
- First aid kit: Mytac First Aid Kit 200-piece — OSHA-compliant, keep on the job site
Final Thoughts
Operating a skid steer well takes time. Your first hours behind the controls will feel awkward — the machine will dart, the bucket will bounce, and every turn will feel imprecise. That is normal. By 20 hours of seat time, the controls will begin to feel intuitive. By 100 hours, experienced operators develop a feel for the machine that makes them genuinely productive.
The fundamentals covered in this guide — pre-op inspection, proper entry/exit, restraint bar discipline, low travel height, and slope awareness — are the same practices that experienced operators follow for their entire careers. They are not suggestions for beginners; they are permanent habits that prevent permanent consequences.
Start slow, stay safe, and the skid steer will become one of the most useful tools you own.

Ironworks Insider Editorial Team
Independent trade-focused editorial team