Undercarriage Maintenance for Tracked Equipment: Complete Guide
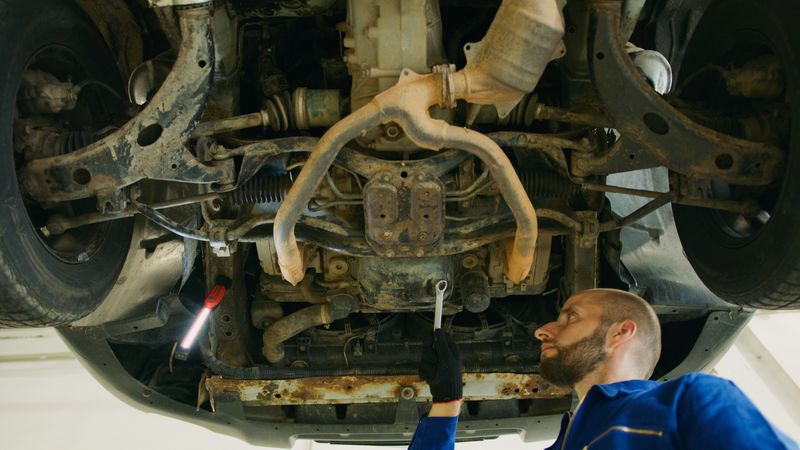
The undercarriage is the single most expensive wear system on any tracked machine. On an excavator, dozer, or compact track loader, undercarriage components can account for 40–60% of total machine operating costs over its lifetime. Yet undercarriage maintenance is consistently undertreated — operators check fluids and change filters, but let tracks run loose, rollers leak oil, and sprocket teeth wear to hooks before taking action.
This guide gives you a complete framework for excavator undercarriage maintenance and tracked equipment in general. We cover every component, build a practical daily inspection habit, explain track tension adjustment, define wear thresholds and replacement intervals, and share the habits that separate contractors who see $10/hour undercarriage costs from those who see $30/hour.
Understanding the Undercarriage System
Before you can maintain it properly, you need to understand what you’re working with. The undercarriage is not a single part — it’s an integrated system of wear components, each affecting the wear rate of the others.
Primary Components
Tracks (Shoes/Pads)
Tracks are the outer links that contact the ground. On steel-tracked machines (most excavators, dozers, and crawler loaders), the track chain consists of alternating inner and outer links connected by track pins and bushings. Steel shoes are bolted to the outer links.
On rubber-tracked machines (compact track loaders, mini excavators), a continuous reinforced rubber belt runs around the undercarriage. Rubber tracks are gentler on finished surfaces and provide lower ground pressure but wear faster in rocky or abrasive conditions.
Track Rollers (Bottom Rollers)
Bottom rollers run along the lower track rail, supporting the machine’s weight. A typical excavator has 7–9 bottom rollers per side. Each roller contains sealed oil-bath bearings. They are the highest-wear rollers due to the constant load they carry.
Carrier Rollers (Top Rollers)
Carrier rollers support the upper run of the track between the drive sprocket and front idler. Most machines have 1–2 carrier rollers per side. While they carry less load than bottom rollers, they are exposed to debris accumulation and seal leaks.
Front Idlers
The front idler guides the track at the front of the machine and maintains tension. It is spring-loaded (through the track tensioning system) to absorb shock loads from impacts. Idler wear affects track guidance and, if the idler wobbles due to bearing wear, causes uneven track wear across the width of the shoe.
Drive Sprockets
The drive sprocket is bolted to the final drive output and drives the track forward. It engages the track pins or track bushings depending on design. Sprocket tooth wear is a critical indicator — worn teeth accelerate pin and bushing wear dramatically. Sprockets should always be evaluated as part of any track replacement decision.
Final Drives
Final drives (also called travel motors) convert hydraulic pressure into the torque that drives the sprockets. Internal seal leaks in final drives often go unnoticed until the oil level drops and bearing damage occurs. Final drive replacement is one of the most expensive undercarriage repairs.
Track Frame (Main Frame)
The track frame is the structural backbone the entire system attaches to. Frame cracks are uncommon but serious. Inspect weld joints at roller mounting bosses and frame corners, especially after impact events.
Daily Undercarriage Inspection Checklist
Build these checks into your pre-operation walkthrough. They take under 10 minutes and catch issues before they become expensive failures.
Every Day Before Operation
- Walk the full track perimeter — look for missing bolts, cracked shoes, bent links, and lodged rocks
- Check track tension — visually inspect sag at the top of the track; verify against spec
- Inspect idlers — look for oil weeping from seals (a red or dark oily residue on the idler housing)
- Inspect bottom rollers — same check; a leaking roller will leave a grease/oil trail on the ground
- Check carrier rollers — look for debris packing and seal leaks
- Inspect sprocket teeth — a quick visual while walking past; look for hooks or sharp points instead of rounded wear
- Check drive sprocket hardware — confirm sprocket mounting bolts are tight (on machines where accessible)
- Inspect track shoes — look for cracked shoes, especially in extreme cold; check grouser height if work is on pavement or grades
Weekly (or Every 50 Hours)
- Measure track sag with a straight edge and ruler against manufacturer specifications
- Grease track rollers and idler hubs where Zerk fittings are present (varies by machine)
- Check final drive oil level using the sight glass or check plug
- Inspect frame and cross-members for cracks, especially after impact work (demolition, rock)
- Clean mud and debris packing from between rollers and around the sprocket
Track Tension Adjustment
Proper track tension is the most important single maintenance habit for undercarriage longevity. Running tracks too tight or too loose both accelerate wear — but in different ways and on different components.
Why It Matters
- Too tight: Accelerates wear on pins, bushings, rollers, and idlers due to excess pre-load. Increases rolling resistance and fuel consumption. May cause link cracking in cold weather.
- Too loose: Causes track derailment risk. Increases track whip at high travel speed. Allows the track to “slap” against carrier rollers and idler, accelerating flange wear.
How to Measure Track Sag
- Move the machine forward one complete track rotation on flat, firm ground
- Stop with one track section spanning between the carrier roller and front idler (the flat section on top)
- Lay a straight edge across the carrier roller and front idler
- Measure the gap between the straight edge and the lowest point of the track (the sag)
- Compare to the manufacturer specification — typically 1–2 inches (25–50 mm) for most steel-tracked machines; consult your specific manual
Adjusting Tension
Track tension is adjusted through a grease-filled tension cylinder (also called a recoil spring assembly) accessed from inside the track frame.
- To tighten: Add grease through the Zerk fitting on the tension cylinder using a high-pressure grease gun
- To loosen: Carefully loosen the relief valve on the tension cylinder to release grease — do this slowly; the cylinder is under significant pressure
Caution: Never stand directly in front of the relief valve when loosening tension. The released grease can spray under high pressure.
Ground Condition Adjustments
| Condition | Recommended Track Sag |
|---|---|
| Hard, dry ground | Standard spec (firm end of range) |
| Soft, muddy ground | Slightly looser than spec (prevents packing) |
| Rocky ground | Standard spec |
| Sandy soil | Standard spec |
| Extreme cold (below 0°F) | Slightly looser (prevents cracking due to contraction) |
Wear Indicators and Replacement Intervals
Track Pin and Bushing Wear
Track pins and bushings wear by rotating against each other within the track link. Pin/bushing wear is measured by pitch elongation — as the pin and bushing wear, the effective link pitch increases, causing the chain to “stretch.” Elongation over 3–4% of design pitch typically indicates time for service.
On reversible pin-and-bushing tracks, turning (rotating) the pins and bushings at 50% wear extends service life significantly. This is a common maintenance procedure on high-hour fleets.
Sprocket Wear
Sprocket teeth wear in a predictable hook pattern. Replace sprockets when:
- Tooth face wear reduces the tooth width by 25% from new
- Teeth develop a pronounced hook or point profile
- The sprocket is no longer smoothly engaging the track bushings
Always install new sprockets when replacing tracks. Installing new tracks on worn sprockets accelerates pin and bushing wear immediately.
Roller Wear
Bottom rollers are measured at the flange and tread diameter. Replace when:
- Tread diameter reaches 90% of new specification
- Flanges are worn to the point where the roller no longer guides the track laterally
- Internal bearing noise is detectable (rough rotation, grinding)
- Oil seal leaks are visible
Idler Wear
Idlers are measured similarly to rollers. Additional checks:
- Idler wobble (bearing play): More than 0.040 inches of lateral play indicates bearing replacement
- Shell wear: Measure tread width and diameter against specification
Track Shoe Wear
Steel shoe grousers (the raised bars on the shoe) wear from the top. Replace when:
- Grouser height drops to 25–30% of original height
- Cracks appear in the shoe casting (especially after freeze-thaw cycles)
- Shoe bolts cannot be re-torqued due to stripped threads in the link
Rubber Track Wear
Rubber tracks require more frequent visual inspection because failure can be sudden. Replace when:
- Core (steel belt) cords are exposed through the rubber tread
- Lugs are cracked more than halfway through the rubber thickness
- Edge delamination extends more than 2 inches inward from the track edge
- Drive lug height drops to less than 50% of original
Common Undercarriage Failure Modes
Derailment
Causes: loose track tension, worn idler flanges, bent track links, operator spinning on hard surfaces
Prevention: maintain proper tension, inspect idler flanges monthly, minimize unnecessary spinning
Sprocket Tooth Breakage
Causes: impact loading from rocks caught between sprocket and track, worn teeth weakened by fatigue
Prevention: keep work area clear of large embedded rocks, replace sprockets at correct wear interval
Roller Seal Failure
Causes: abrasive fine material (sand, concrete dust) working past seals, age, pressure washing directed at seal faces
Prevention: avoid pressure washing directly at roller seals; track contamination buildup indicates need for more frequent cleaning
Final Drive Failure
Causes: operating with low final drive oil (from a slow leak), contamination through a failed input shaft seal
Prevention: check final drive oil level weekly; investigate any oily residue near final drive housing immediately
Track Link Cracking
Causes: severe impact loading, operating in extreme cold below design temperature with over-tight tracks
Prevention: loosen tension in cold weather; avoid dropping loaded buckets on frozen ground if possible
Cleaning Procedures
Daily cleaning of mud and debris packing is the most cost-effective undercarriage maintenance habit. Packed material:
- Traps moisture against metal components, accelerating corrosion
- Creates abrasive grinding as the track runs through it
- Adds weight that increases rolling resistance
- Packs into roller and idler gaps, creating uneven wear pressure
Cleaning Best Practices
- Use a pressure washer or water wand to flush packed material from between rollers and around the sprocket
- Wash from the inside out — start at the frame and work toward the track perimeter
- Avoid directing high-pressure water at roller and idler seals — use lower pressure at an oblique angle near seal faces
- After washing, run the machine briefly to expel excess water from track cavities
- In freezing conditions, wash before parking for the day and run the machine immediately after washing to prevent freeze-up
Extended Undercarriage Life: Pro Tips
1. Minimize spinning and counter-rotation. Every time you spin (one track forward, one reverse) on hard or abrasive ground, you scrub rubber or steel against the surface at maximum force. Each spin is equivalent to several hundred feet of straight-line travel in terms of wear. Use gradual turns; stop and re-position rather than spinning on pavement.
2. Match undercarriage type to the application. Wide shoes reduce ground pressure in soft conditions. Narrow shoes in rocky terrain reduce stress on shoe castings. Rubber tracks belong on finished surfaces and grass — not in quarry rock or heavy rip-rap.
3. Travel straight on slopes. Side-hilling (traveling across a slope at an angle) forces one track to carry asymmetric load. This accelerates wear on the downhill roller flanges and track links. Travel up and down grades whenever possible.
4. Reduce reversals. Constant forward-reverse cycling is hard on pins and bushings because the loading direction reverses, creating impact wear. On confined sites, planning travel paths to minimize reversals extends undercarriage life.
5. Keep the machine as level as possible during operation. Extended excavating or dozing with the machine severely off-level creates uneven load distribution across the rollers, wearing the heavily loaded side faster.
Recommended Maintenance Products and Tools
- High-pressure grease gun (10,000 PSI rated) — required for track tension adjustment; standard grease guns do not generate sufficient pressure
- Track tension grease (NLGI #2 EP grease cartridges) — use the manufacturer-specified grease for tension cylinder
- Final drive oil (gear oil, consult machine spec) — keep on hand for topping off during weekly checks
- Mechanic’s straight edge and sag measurement ruler — for accurate track tension measurement
- Telescoping inspection mirror — for inspecting inside track frame without removal
- Portable pressure washer (1,800–2,000 PSI) — for daily undercarriage cleaning; essential for sites with heavy clay
- Track pin press (hydraulic) — for field track repair and link replacement
- Torque wrench (3/4” drive, 400 ft-lb) — for track shoe bolt re-torquing
Maintenance Log and Tracking
Keep a written or digital log for every undercarriage inspection. Record:
- Date, hour meter reading
- Track sag measurement (both sides)
- Roller inspection results (leak: yes/no, side)
- Sprocket condition rating (1–5 scale)
- Any repairs made or parts ordered
Trending wear data over time lets you predict replacement timing and schedule repairs during planned downtime rather than emergency breakdowns. Many modern machines with telematics (CAT Product Link, Komatsu KOMTRAX, Deere JDLink) allow remote hour tracking and fault alerts that support this discipline.
Bottom Line
Undercarriage maintenance is the highest-ROI maintenance discipline on any tracked machine. The habits that extend undercarriage life — daily cleaning, consistent track tension, minimizing spinning, matching shoe type to terrain — cost almost nothing in time and materials. The alternative — reactive replacement of worn sprockets, broken rollers, and stretched chains — costs tens of thousands of dollars per rebuild event.
Build the daily inspection into your machine startup routine, measure track tension weekly, and address roller leaks the week they appear rather than the month after. Those habits alone will cut your undercarriage cost per hour significantly.

Ironworks Insider Editorial Team
Independent trade-focused editorial team