Why excavator tracks keep coming off: Diagnostic guide
Quick answer
An excavator track usually keeps coming off because the track is outside its model-specific tension specification, debris is changing the effective tension, the idler, rollers, sprocket, lugs, or chain are worn or damaged, the adjuster is not holding position, the track frame is misaligned, or operating conditions are forcing the track sideways. Stop after a derailment, secure the machine, and diagnose the repeating pattern before refitting or adjusting anything.
Common questions
- Why does the same excavator track keep coming off?
- A repeat failure on one side points toward a side-specific problem such as an adjuster that is not holding, a worn or seized roller, idler play, sprocket wear, damaged guide lugs, an incorrect track, or track-frame misalignment. Compare both sides after safely isolating the machine and have a qualified technician measure components to the service limits.
- Can an excavator track come off even when the tension looks correct?
- Yes. A static sag check can miss a leaking adjuster, packed debris, worn guide components, internal track damage, misalignment, or side-loading during turns and slope work. Measure by the exact manual procedure and inspect the whole undercarriage.
- Should I tighten a loose excavator track as much as possible?
- No. Excess tension increases load and wear, while insufficient tension can allow derailing or lug indexing. Use the exact model's specified measurement, machine position, and adjustment procedure; do not use a generic gap.
- Can an operator put a thrown mini excavator track back on?
- Only when the manufacturer permits the procedure, the worker is trained and authorized, the machine is on suitable ground, and the required support and handling equipment are available. A suspended machine, pressurized grease adjuster, heavy track, and pinch points make improvised refitting unsafe.
Source note: Reviewed against current Caterpillar rubber-track maintenance and wear guidance and Bobcat compact-excavator track-tension and damage-prevention guidance. The operation and maintenance manual and service information for the exact model, serial number, undercarriage, and track type control.
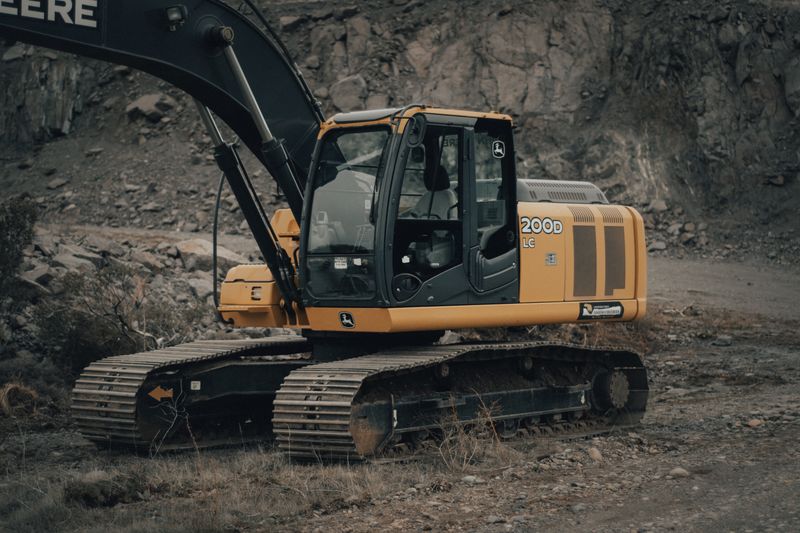
If an excavator track keeps coming off, do not treat refitting it as the repair. The usual diagnostic branches are incorrect tension, packed material, worn or damaged guiding parts, an adjuster that will not hold, the wrong or damaged track, undercarriage misalignment, and operating conditions that push the track sideways.
Start with the pattern: which side derails, where the track leaves the undercarriage, what maneuver came immediately before it, and whether the measured tension changes over time. Those observations can separate a one-time obstruction from a fault that will throw the track again.
Stop and secure the machine first
A thrown track can leave an excavator tilted, partly supported, or immobilized on poor ground. Do not travel farther to reach a convenient repair spot if movement could worsen the derailment or stability problem.
- Lower the attachment if the manufacturer permits it without destabilizing the machine.
- Stop the engine, control the key, isolate stored energy, and follow site lockout/tagout rules.
- Establish an exclusion zone around the machine, suspended components, and the loose track.
- Never work under a machine held up only by its boom, blade, hydraulics, or an improvised support.
- Keep hands away from suspected high-pressure grease or hydraulic leaks. A fluid-injection injury needs immediate medical attention.
- If the machine is on a slope, at an excavation edge, in traffic, or on failed ground, use the recovery plan and a qualified recovery provider.
The exact operator and service manuals decide how the machine may be lifted, blocked, depressurized, inspected, and repaired. Our ground conditions and equipment stability guide can help identify site hazards, but it does not replace the manufacturer’s recovery procedure.
Match the failure pattern to the first checks
Use the symptom table to prioritize safe observations. It is not proof of a failed part.
| What happened | Check first after safe isolation | What the pattern may indicate |
|---|---|---|
| Track came off during a sharp turn or counter-rotation | Track tension, packed material, side loading, site surface | Loose track, reduced guidance, or an operating maneuver that forced the track sideways |
| Same side keeps coming off | Side-to-side tension, idler position, rollers, sprocket, lugs or links | Adjuster leakage, local wear, damage, wrong track, or alignment fault |
| Problem began in mud, gravel, demolition debris, or freezing weather | Material packed around the sprocket, idler, and rollers | Effective tension changed as material entered or left the undercarriage |
| Track indexes or jumps at the sprocket | Track-to-sprocket engagement and track specification | Excess slack, worn components, damaged drive lugs, or a pitch or fit mismatch |
| Tension is correct after adjustment but soon changes | Time-stamped tension measurements and idler position | Adjuster, valve, seal, or recoil-assembly fault |
| Problem began after track replacement | Part number, width, pitch, link or lug count, installation record, mating-part wear | Incorrect fit, installation issue, mismatched wear, or unresolved alignment problem |
Diagnose why the track keeps coming off
1. Verify tension by the exact manual method
Track tension is the first check, not the whole diagnosis. The correct measurement point, machine position, track orientation, sag range, and ground conditions vary by model and track type. Do not copy a generic one- or two-inch figure from another machine.
Caterpillar’s current rubber-track maintenance guidance says a loose track can derail or let the drive lugs index or jump. It also directs owners to the operation and maintenance manual for the model-specific tension specification. Bobcat likewise states in its compact excavator track-tension guidance that tracks must be neither too loose nor too tight.
Record both sides using the same manual procedure. If one side changes after a short, approved function check, stop and have the adjuster and related components tested. The grease tensioner stores substantial energy; never loosen a valve, remove a fitting, or search for leakage unless the exact service procedure authorizes the work and you are trained and equipped for it.
2. Remove packed material from the diagnosis
Mud, stones, demolition fragments, and frozen material can pack between the track and undercarriage. Packing can increase tension while present, then leave excessive slack when it falls out. A hard object can also momentarily lift or guide a track out of position.
Clean only after the machine is safely shut down and stable, using the manual’s access and tool guidance. Do not reach between a track and roller, idler, or sprocket. Bobcat’s rubber-track damage-prevention guide identifies uneven surfaces, spot turns, slope operation, curb edges, and trench-straddling as de-tracking or track-damage risks, especially when maintenance and tension are not correct.
3. Inspect every guiding and driving component
The track is one part of a system. With the machine safely isolated, compare the problem side with the other side and look for:
- A roller that is seized, loose, leaking, missing, or worn at its flange
- Idler play, uneven position, damaged guides, or an idler that sits at an unusual angle
- Hooked, sharp, chipped, or unevenly worn sprocket teeth
- Torn or missing rubber-track drive lugs, exposed reinforcement, cracked links, loose shoes, or damaged chain components
- Fresh rub marks concentrated on one edge
- Bent guards, lodged objects, loose hardware, cracked mounts, or visible track-frame damage
Caterpillar’s mini excavator rubber-track wear guide emphasizes correct tension, debris removal, and inspection for tread and rubber damage. Service limits still come from the exact machine and track documentation. A visual check cannot establish that a roller, idler, chain, or frame is within tolerance.
If the track stays engaged but one side is weak, noisy, leaking, or changes as the oil warms, use the excavator final drive troubleshooting matrix to separate undercarriage drag from upstream hydraulics, travel-motor behavior, and the planetary gearbox.
For the broader maintenance routine, use our tracked-equipment undercarriage guide. If the derailment appeared during a purchase inspection, add the finding to the used excavator inspection process rather than accepting a quick refit as proof of condition.
4. Confirm the track actually matches the machine
A rubber track or chain can look close enough to install yet have the wrong pitch, width, link count, lug pattern, or approved application. Record the machine model and serial number, undercarriage configuration, track markings, supplier part number, and the part numbers installed on both sides.
If the problem began after replacement, ask the supplier or dealer to confirm the application in writing. Also have the sprocket, rollers, idler, guides, and adjuster checked. A new track does not correct worn mating components or a bent frame.
5. Separate operating conditions from mechanical faults
Sharp pivot turns, side-slope travel, curbs, trench edges, rocks, and working with one track poorly supported can create lateral load. Follow the operating limits and travel techniques in the exact manual, and change the route or work setup when the ground is forcing the track sideways.
Do not label every derailment “operator error.” A sound operating review should be paired with measurements and component inspection. Repeated derailment under ordinary approved operation is evidence that the machine needs a qualified undercarriage diagnosis.
When to stop and call a qualified technician
Keep the excavator out of service when the track will not hold its specified tension, the same side derails again, a roller or idler is loose or seized, the sprocket or track is visibly damaged, the frame may be bent, a high-pressure leak is suspected, or safe support cannot be established.
A qualified technician can verify the track specification, measure wear and alignment, test whether the adjuster holds, inspect the recoil assembly, and follow the OEM refitting procedure with rated lifting and support equipment. Do not improvise with a bucket, pry bar, strap, another machine, or a person inside the pinch zone.
Next step: create a repeat-failure record
Before parts are moved, record the hour meter, machine and track identifiers, side and location of derailment, maneuver, ground condition, load, recent repairs, tension on both sides, visible damage, and photos taken from outside the hazard zone. Add the event to the heavy equipment inspection log and connect it to the normal pre-operation inspection.
The useful repair is the one that explains why the track left its path. Secure the machine, preserve the evidence, and let the exact manual and measured condition—not a rushed refit—decide what happens next.

Ironworks Insider Editorial Team
Independent trade-focused editorial team