How to Inspect a Used Excavator: 30-Point Pre-Purchase Checklist
Quick answer
A used excavator inspection should cover hours, service records, leaks, undercarriage, pins and bushings, hydraulics, swing play, electronics, attachments, and a warm operating test. Cosmetics matter less than structural wear and hydraulic health.
Common questions
- What is the biggest red flag on a used excavator?
- Major hydraulic leaks, excessive boom or bucket play, severe undercarriage wear, structural cracks, and missing service records can all turn a bargain into a repair liability.
- Why test the machine warm?
- Some hydraulic, engine, and electrical issues appear only after the machine reaches operating temperature. A short cold start does not prove job-ready condition.
Source note: Reviewed July 2026 against the article guidance and common heavy-equipment practice; manufacturer manuals, site plans, OSHA rules, and competent-person direction control field work.
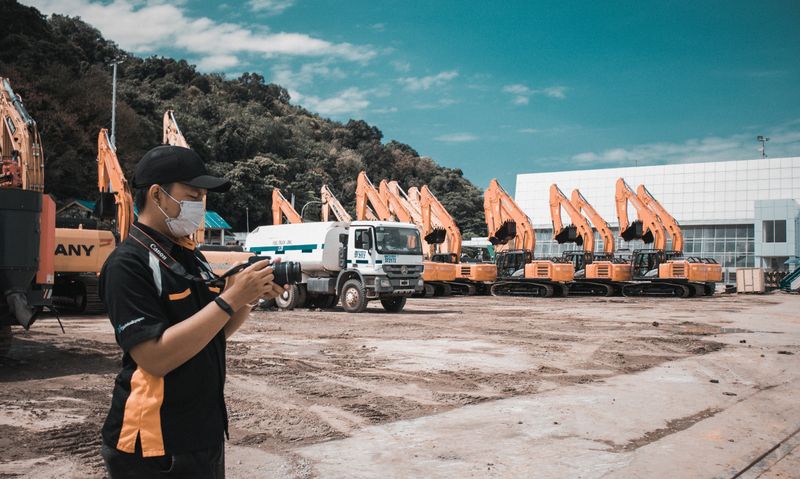
A used excavator can be one of the best investments in your equipment fleet — or a money pit that bleeds cash on repairs from day one. The difference between a great buy and a disaster almost always comes down to how thoroughly it was inspected before purchase.
The used equipment market is full of machines that look presentable on the outside while concealing serious mechanical, structural, or hydraulic problems underneath. Sellers know this. Buyers who don’t ask the right questions and don’t know what to look at get taken.
This 30-point inspection checklist gives you the framework to assess any used excavator — from a 5-ton mini to a 50-ton long-reach — before writing a check.
If the machine is being sold through a timed or live sale, pair the physical inspection with the heavy-equipment auction bid-cap checklist so fees, ownership records, emissions geography, removal, transport, and repair reserves are included before bidding.
Before You Start: What to Bring
- Flashlight or headlamp — essential for peering into dark compartments
- Mechanic’s mirror — for viewing hidden surfaces
- Pocket penetrometer or screwdriver — for checking rubber seal hardness
- Tape measure — for undercarriage wear measurements
- Phone or camera — document everything
- Hydraulic cylinder contamination test strips — optional but useful
- Cold start if possible — arrange to arrive before the machine has been warmed up
Section 1: Machine History and Documentation
Before touching the machine, gather as much history as possible.
1. Hours Check the dash meter and record the hours. Compare to any maintenance records provided. On older machines, watch for round numbers — 5,000, 10,000 — that suggest a rolled odometer.
2. Ownership and service records Ask for service records, dealer invoices, and any history of major repairs or failures. A machine without records isn’t a dealbreaker, but it requires more thorough physical inspection.
3. Machine identification Write down the make, model, serial number, and PIN. Run the serial number through the manufacturer’s records (CAT, Komatsu, Volvo, Hitachi, and Deere all have online serial lookup tools) to verify model year, configuration, and whether it’s been subject to any safety bulletins or recalls.
4. Telematics data Many machines manufactured after 2010 have factory telematics systems (CAT Product Link, Komatsu KOMTRAX, Volvo CareTrack). Ask the seller to pull utilization reports — they show actual machine hours, idle time percentage, fuel burn, and fault code history. This is some of the most valuable pre-purchase data available.
Section 2: Undercarriage (The Most Expensive Repair)
The undercarriage — tracks, rollers, idlers, sprockets, and frames — accounts for 50–60% of a tracked machine’s total maintenance cost over its life. On a worn machine, undercarriage replacement can cost $20,000–$60,000+ depending on machine size. Inspect this section first.
5. Track shoe wear Look at the grouser bars on each track shoe. New grouser bars are 2 to 2.5 inches tall. Below 0.75 inches, the shoes are worn and should be replaced. Check several shoes across the length of both tracks.
6. Track tension and sag With the machine on flat ground, measure the sag at the midpoint of the lower track run. Most manufacturers specify 10–20mm of sag. Excessive sag indicates worn chain links or improper adjustment. Note whether the front carrier rollers are visible — a track that’s too loose will pop off the rollers in tight turns.
7. Track chain wear (pitch elongation) Measure the distance across 10 chain links (pin to pin). Compare to the manufacturer’s specification for new chain pitch. Chain elongation beyond 2–3% of new pitch means the chain and sprocket are worn and likely need replacement together. A master link replacement alone won’t fix elongated chain.
8. Rollers: bottom rollers and top (carrier) rollers Check all bottom rollers for:
- Oil seal leaks (dark oily residue around roller ends = internal seal failure)
- Flange wear (the side flanges that keep the track centered; worn flanges allow track walk)
- Flat spots from running on hard surfaces
Check top (carrier) rollers similarly. Roller replacement typically runs $150–$500 per roller; a full replacement of all bottom rollers on a 20-ton machine can exceed $4,000.
9. Front idler wear The front idlers guide the track and absorb shock at the front of the machine. Check for seal leaks (oil weeping around the center hub), flange wear, and flat spots. Also check the recoil spring system — the idler should have some forward/backward play to cushion rock impacts.
10. Sprocket wear Look at the drive sprocket teeth. New teeth have a smooth, rounded profile. Worn teeth develop a sharp, “hook” shape and may be visibly pointed. Severely worn sprocket teeth accelerate track chain wear and should be replaced when the chain is replaced. Sprocket replacement cost: $400–$1,500 per side depending on machine size.
11. Track frame condition Examine the main track frames for cracks, especially at the frame-to-house connection and around any existing repair welds. Cracks in the track frame are a serious structural issue.
Section 3: Hydraulic System
Hydraulic problems are expensive to diagnose and repair. Look for these indicators.
12. Cylinder rod condition Inspect all hydraulic cylinder rods (boom, arm/stick, bucket, and any attachments). Rods should be:
- Shiny and smooth — pitting, scoring, or rust indicates contamination inside the cylinder and imminent seal failure
- Straight — bent rods indicate impact damage or overload and cannot be repaired; the cylinder must be replaced
13. Hydraulic hoses Check every accessible hose for cracks, chafing, soft spots, or external damage. Bulging hoses indicate internal lining failure — they’re a pressurized failure waiting to happen. Budget $100–$300+ per hose for replacements on large machines.
14. Hydraulic cylinder drift With the machine at idle, raise the boom to full height and the bucket to full crowd. Shut the engine off and watch for 2–5 minutes. Cylinders should not drift more than a few millimeters. Significant drift indicates worn cylinder seals, worn control valve seals, or a load-holding valve problem. This can cost $500–$3,000+ per cylinder to repair.
15. Hydraulic fluid condition Pull the dipstick and look at the fluid. It should be:
- Clean red, orange, or yellow (depending on OEM spec)
- Free of milky appearance (water contamination) or black color (overheated or heavily oxidized fluid)
- If you smell burning or see obvious debris, walk away
16. Swing motor and swing gear Operate the swing in both directions at full throttle and listen for:
- Abnormal noise (grinding, clunking, metal-on-metal)
- Hesitation or jerkiness in swing initiation
- Excessive drift after stopping swing
Test swing parking brake holding: swing 90 degrees, release controls, and the machine should hold position on a 5% grade. Swing motor rebuilds: $3,000–$8,000.
17. Auxiliary hydraulics If the machine has auxiliary hydraulics (for running attachments), test flow and pressure if possible. Weak auxiliary flow limits what attachments you can run effectively.
Section 4: Engine
18. Cold start This is why you want to arrive before the machine is warmed up. A cold start is much more revealing than a warm one. Watch for:
- White smoke for more than 60 seconds after startup (indicates coolant in combustion = head gasket or cracked head)
- Black smoke at startup (normal briefly, but persistent black smoke indicates fuel system or injection issues)
- Blue smoke (oil burning = worn piston rings or valve stem seals)
- Rough idle that doesn’t smooth out after warming
19. Coolant condition Open the radiator cap or coolant overflow (on a cold engine only). Coolant should be green, pink, or blue — clear and clean. Orange, brown, or foamy coolant indicates corrosion, contamination, or oil mixing (blown head gasket).
20. Engine oil Pull the dipstick. Clean oil is amber to brown. Black oil is heavily used but not necessarily failed. Milky or gray oil with a pasty texture means coolant intrusion — serious.
21. Air filter condition A heavily loaded or black air filter element means either high-dust operating conditions (appropriate maintenance concern) or a filter that hasn’t been changed in a very long time. Replacement cost is low, but it’s an indicator of general maintenance practices.
22. Exhaust system and DEF/DPF (Tier 4 machines) On newer machines with Tier 4 emissions systems, ask specifically about DPF regeneration history, any DEF system faults, and whether the SCR catalyst is in good condition. A failed DPF replacement can cost $5,000–$15,000. Pull the service history for any emissions-related fault codes.
Section 5: Structural Components
23. Boom and arm (stick) inspection Examine the entire boom and arm with the machine lowered. Look for:
- Cracks — especially at welds, pin bosses, and stress concentration points
- Repair welds — old cracks that were patched (ask about history of the repair; some are fine, some indicate chronic stress)
- Bend — a bent boom or arm indicates a severe impact or overload event
Use the mechanic’s mirror and flashlight to check the inside radius of the boom curve, which is the highest-stress zone.
24. Bucket condition Examine the bucket for:
- Cutting edge wear (replaceable; budget $300–$1,500 for a new edge)
- Bucket teeth condition (worn tips reduce efficiency; easy to replace)
- Cracks or heavy wear at pin bosses (more expensive)
- Structural cracks along welds in the main bucket body
25. Pin and bushing wear At each pin connection (boom to house, boom to arm, arm to bucket), check for:
- Side play — grab the component and try to move it laterally. More than 1/4 inch of side play indicates worn bushings
- Up-down play — excessive vertical play at the pins means the pins themselves are worn
- Listen for knocking or clunking when you change direction of movement
Pin and bushing replacement runs $200–$800 per joint depending on size.
Section 6: Cab and Controls
26. Cab condition Inspect the cab for:
- ROPS/FOPS certification markings — if modified in a way that compromises structural integrity, it’s a safety issue
- Glass condition — chips and cracks reduce visibility and can fail safety requirements
- Seat condition, armrest adjustability, and presence of seatbelt
- Air conditioning function (in hot climates, a non-functional AC is a serious productivity issue)
27. Controls and joysticks Operate all functions and note:
- Joystick play or looseness (worn joints or worn joystick boots)
- Any functions that require more effort than others (indicates hydraulic valve wear or spool sticking)
- Pattern (ISO vs. SAE): note which pattern and verify it can be switched if desired
28. Electrical systems Check all gauges, warning lights, wiper function, lights (front/work lights, beacon), backup alarm, and horn. Ask if any warning lights are illuminated or if any fault codes are stored. Request a telematics fault code report if available.
Section 7: Final Assessment
29. Walk-around at operating temperature After running the machine through all function tests, do a final walk-around. Look for:
- Any new leaks that appeared during operation (hydraulic, coolant, fuel)
- Smoke from any unusual areas
- Unusual heat sources around the engine or hydraulic components
30. Professional inspection For any machine where you’re seriously considering purchase — especially at $50,000+ — consider hiring an independent mechanic or a CAT/Komatsu dealer service department to perform a formal inspection. Cost: typically $300–$800 for a comprehensive inspection, including cylinder leakdown tests and hydraulic pressure readings. This is cheap insurance against a $20,000 surprise.
Red Flags That Should End the Inspection
- White smoke on cold start that persists beyond 2 minutes
- Oil in the coolant (milky/pasty dipstick)
- Structural cracks in boom, arm, or track frame
- Severely scored hydraulic cylinder rods
- Major hydraulic drift (2+ inches per minute) with engine off
- Telematics data showing repeated fault codes, especially emissions faults
- Seller refuses to allow a cold start or refuses an independent inspection
Used Excavator Price Benchmarks (Approximate, 2024–2025)
| Machine Class | Good Condition | Fair Condition | Worn / High Hours |
|---|---|---|---|
| Mini (2–6 ton, <3,000 hrs) | $20,000–$50,000 | $10,000–$25,000 | <$10,000 |
| Mid (8–15 ton, <5,000 hrs) | $60,000–$130,000 | $35,000–$70,000 | <$30,000 |
| Standard (20–30 ton, <8,000 hrs) | $120,000–$250,000 | $60,000–$130,000 | <$60,000 |
| Large (35–50 ton, <10,000 hrs) | $200,000–$400,000+ | $100,000–$200,000 | <$90,000 |
Recommended Tools for the Inspection
- Mitutoyo 500-196-30 Digital Caliper — for measuring pin/bushing wear, grouser height, and chain pitch
- CRAFTSMAN Telescoping Inspection Mirror — magnetic head, extendable; essential for viewing boom and arm interiors
- Elecall Digital Infrared Thermometer — for detecting hot spots on hydraulic components and bearings without contact
- TeeJet R2F1 Flashlight (1000 lumens) — bright enough to clearly illuminate dark undercarriage compartments
Bottom Line
A thorough used excavator inspection takes 2–3 hours and requires patience. Work through each section systematically, document everything with photos, and don’t let a seller rush you through the process. The machines that get glossed over in a 30-minute walkthrough are the ones that develop $15,000 hydraulic repairs in the first month.
Use this checklist, take your time, and when in doubt — bring in a professional before you commit.
Turn inspection findings into a buy/no-buy decision
These resources help connect used-excavator condition with ownership cost, compact-machine selection, maintenance, and transport.
- Mini excavator buying guide
Use dig depth, tail swing, hydraulic flow, and transport constraints to narrow the model class.
- Equipment ownership cost calculator
Estimate repairs, downtime, financing, and resale before committing.
- Excavator maintenance schedule
Compare inspection findings with expected service intervals and wear items.
- Equipment maintenance reserve planner
Use inspection findings to estimate reserve, downtime, and repair risk before purchase.

Ironworks Insider Editorial Team
Independent trade-focused editorial team